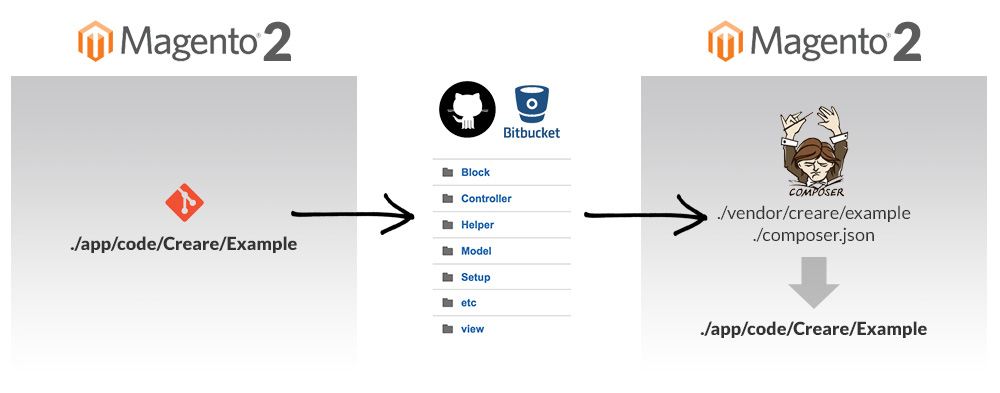
If you’ve developed Magento extensions before and installed them with Composer then you’ll be pretty familiar with what I’m about to go through as Magento 2 modules can be developed in a similar way. I also know lots of people in the community use Modman to develop their Magento 1 extensions, which keeps everything nice and separate. Due to the way Magento 2 modules are now packaged I no longer need Modman, so I decided to share the methodology that I use.
This is aimed as a beginner’s guide, so I hope it will help out those getting started with Magento 2 extension development. If you have any improvements/suggestions let me know in the comments.

1 – INSTALL MAGENTO 2
You must install Magento 2 (using Composer) first – this will be the Magento 2 installation that we use for our extension development. If you’ve not done this before, here’s a blog postI wrote a few months back.
2 – CREATE LOCAL & REMOTE REPOSITORY
Using your preferred Git provider (such as GitHub or BitBucket) you’ll need to create a repository for your module. Back to your local Magento 2 installation, all module files are now stored within app/code – there’s no longer any local/core/community codepools.
Navigate to app/code and create your ‘vendor’ name, and inside that put your module name. In this instance I’m going to call my module ‘Creare/Example’. The folder path to your extension will now be the following, so navigate into this directory:
1
| app/code/Creare/Example |
Now, we want to connect to our remote repository using the following Git commands:
1
2
| git initgit remote add origin https://github.com/user/repo.git |
3 – CREATE MODULE
Here’s the easy part – you just need to create your extension. The fact that all your module files are contained within one directory really is beautiful. I’m not going into any detail regarding module development in this tutorial as I’m simply explaining my workflow. Make sure you’ve pushed all your work to your remote repository, it should look something this:

4 – CREATE COMPOSER.JSON
In order for your module to be compatible with Composer it must include a composer.jsonfile so create one of these within your module directory root and push this to your remote. The contents of your composer.json file should include the following as a minimum:
01
02
03
04
05
06
07
08
09
10
11
12
13
14
15
16
17
| { "name": "creare/example", "description": "My awesome example extension", "require": { "magento/magento-composer-installer": "*" }, "type": "magento2-module", "version": "2.0.0", "extra": { "map": [ [ "*", "Creare/Example" ] ] }} |
We’re basically saying here that our module is called ‘Creare/Example’, it requires and depends on the Magento Composer Installer to work, it’s a Magento 2 module and it’s currently in version 2.0.0. We’ve also told it to map all of its contents into Creare/Examplewhich is our vendor/module path within app/code.
5 – INSTALL MAGENTO 2
You may ask why I am installing Magento 2 again – well, this installation will serve as an example of how your extension can be installed on other Magento 2 websites using composer.
6 – EDIT COMPOSER.JSON
Once you’ve installed Magento 2, you need to go to the root and run the following command to install Magento Composer Installer (the package that our extension is dependent on):
1
| composer require magento/magento-composer-installer |
You now need to edit Magento 2’s composer.json file by writing the following code that will add your module:
1
2
3
4
5
6
|
If your module is still in development then also change the following code withincomposer.json from stable to dev:
1
| "minimum-stability": "dev", |
7 – INSTALL MODULE
Now, simply run the following composer command to install your module:
1
| composer require creare/example |
From this point onwards you can use composer update to fetch updates made to your module.
If all has gone well you should now see your module in app/code using the exact folder path that you specified. Now enable your module by editing app/etc/config.php and adding:
1
| 'Creare_Example' => 1, |


No comments:
Post a Comment
wordpress,magento,opencart and perstashop plugin and theme and latest blog news and latest news in india ,,..best blog in india.....